A user directory is a collection of users. You might have one user directory to hold registered members of your web site, and another to hold users that sign up to a newsletter.
You can decide whether or not users can then log in to your web site, and if so, which areas they get access to that other users don't.
Additionally, you can categorise users within each directory with user roles. This allows you to give one set of users access to one set of pages and a different set of users access to different pages.
To create a new user directory, click the button on the User Directories widget. You will then be shown the directory creation form.
You can choose to send newly-created users a welcome email. If you choose to do so you must first create the email to send them using the template management tools. The type of template to create is User Registration - Email.
You can attach the welcome email to the user registration form (refer to Managing Form Recipients for details about creating form emails), but doing so means if you manually create a new user they will not receive the welcome email.
You can define a custom list of fields to associate with users in the directory. For more details on managing custom lists, refer to Managing Custom Field Lists.
If you choose to manually approve users, then anybody that registers on your web site will have to wait for an administrator to activate their account before they can log in. They will only receive their welcome email once their account is approved.
Enter the details of the user directory then click . Your user directory will then be created and it will appear in the list of user directories.
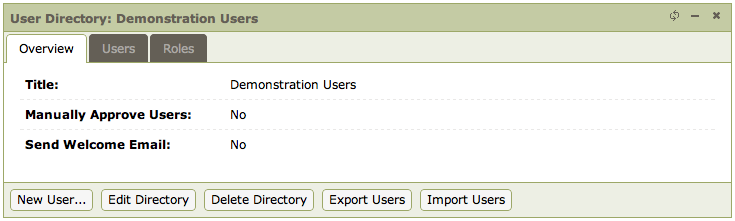
To view the details of a user directory, click on it in the user directory list. It will then open in a new widget.
The tabs across the top allow you to view users in the directory and the available user roles, while the buttons at the bottom allow you to edit or delete the directory, as well as bulk importing or exporting users.
To export users from a directory, click the button at the bottom of the directory. You will then be prompted to select which users you want to export.
If the user directory you're exporting from has roles assigned to it, you can filter the export list by role. You can choose to export users that have no role, users that have any role, or users that have a specific role.
Click the button and you will be prompted to save a comma-separated values (CSV) files. The dialog will remain open until you click the button.
You can import a large number of users at once to a single user directory by uploading a comma-separated values (CSV) file. Each line in the file corresponds to a single user.
Click on the button to begin. A dialog will appear with instructions on which fields to include in your CSV file.
Once you select the file to upload the import will begin. If any errors were encountered in your file you will be prompted to fix any errors.
You can edit the settings for a user directory (such as the custom fields or email template) by clicking on the button when viewing the directory.
Make any changes as required then click the button.
User directories also allow you to manage a series of user roles. This is a way of categorising users to allow differing levels of authorisation. A user can be assigned to any number of user roles.
To manage roles, click on the tab when viewing a user directory. This will show a list of existing user roles.
Click on the button to create a new role. A role can inherit from another role. If a role inherits from another role, it automatically receives all permissions of its parent role unless overridden explicitly.
User roles in user directories are currently only used for page permissions. You can restrict pages in your web site to users based on their user directory and their user role.
If you delete a user role, users that belong to that role are not deleted.
To delete a user directory, either click the link beside the directory in the directories list, or click the button when viewing a directory.
You will be prompted to confirm that you want to delete the user directory. Click to confirm deletion.
Deleting a user directory will also delete all users within that directory. This operation cannot be undone.