Recite CMS is highly customizable, allowing you to decide how you want the Control Panel to be laid out. The Control Panel is built around tabs and widgets.
A tab is a group of widgets, split up into columns. A widget is like a self-contained application, responsible for managing a single aspect of your web site. For example, there is a File Import widget, solely used for uploading files to your web site.
You can have any number of tabs, and each tab can have any number of widgets, arranged as you please. This is demonstrated in the following figure.
The best thing about being able to manage tabs is that you can configure them as required to best suit your current activity. For example, if you're currently implementing a new site design you can have open the template editor and file editor widgets on the same tab so you can quickly make edits.
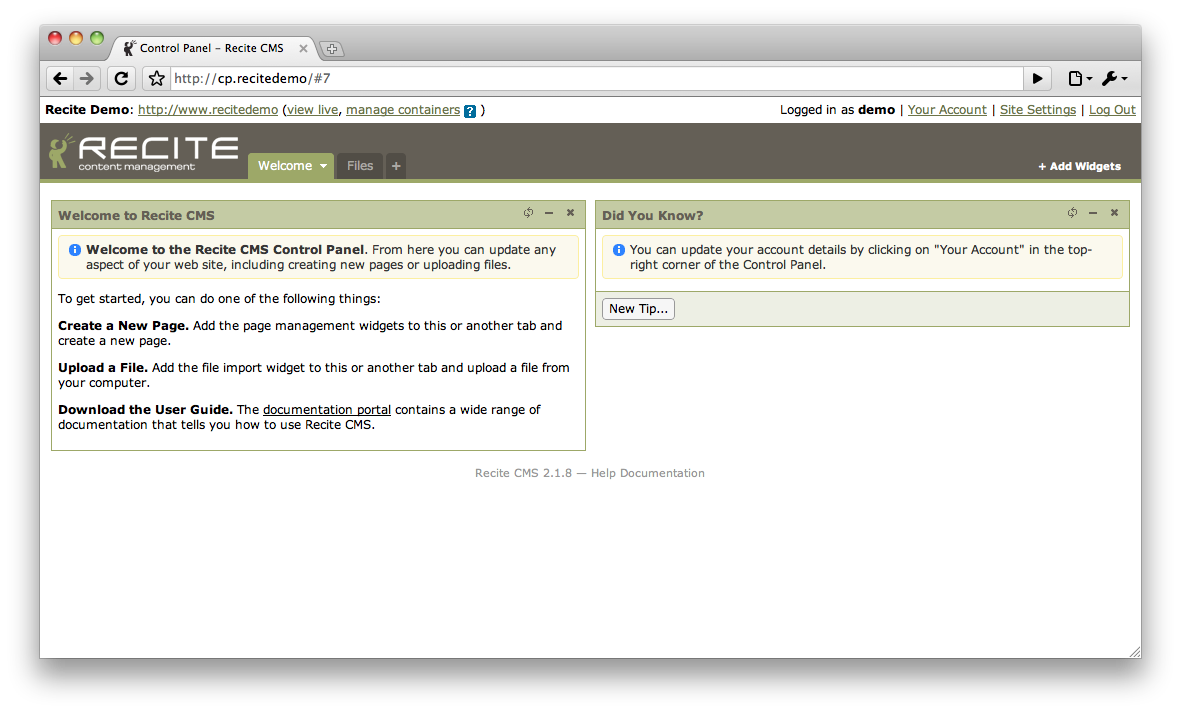
In this figure, there are two tabs (entitled Welcome and
Files). The Welcome tab is currently loaded
(indicated by it being highlighted).
This tab has two columns, each containing one widget. You can interact with these widgets. For example, the right-hand tab (The Did You Know? widget) contains a tip about Recite CMS. You can click the button to reload the widget for a different tip.
Clicking on the tab will load that tab.
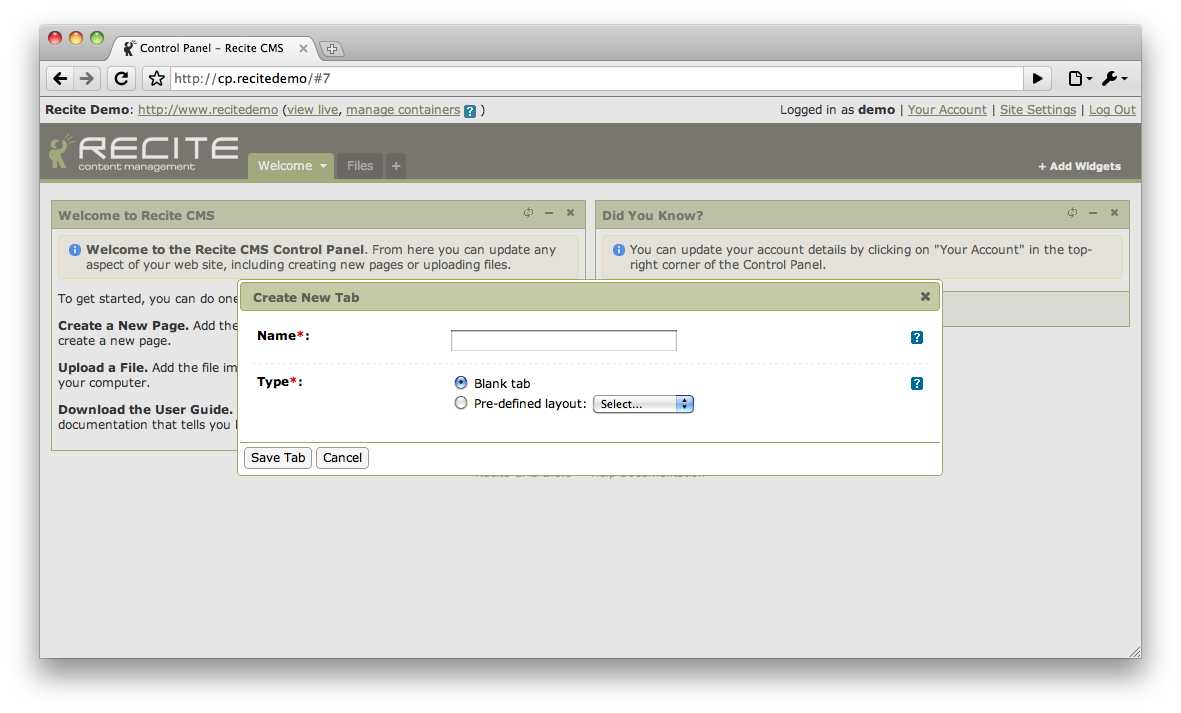
When you first log in to the Control Panel, you may not have any tabs pre-created. If not, you will be prompted to create a new tab before you do anything else. If you already have tabs created you won't be prompted, but you can create new tabs at any time by clicking the "plus" button in the Control Panel (beside the Recite CMS logo). This will open the tab creation dialog.
You can either create a blank tab (to which you will add widgets shortly), or you can add a pre-defined layout. To create a blank tab, enter a name for the tab. To use a pre-defined layout, select it from the drop-down box. If you didn't enter a title yet the name of the selected layout will be used.
Click to create the new tab. Once created, it will automatically be loaded.
If you created a blank tab you will then prompted to add widgets to the tab. This will be covered shortly in Adding New Widgets. To follow through this chapter in order, click to hide widget browser.
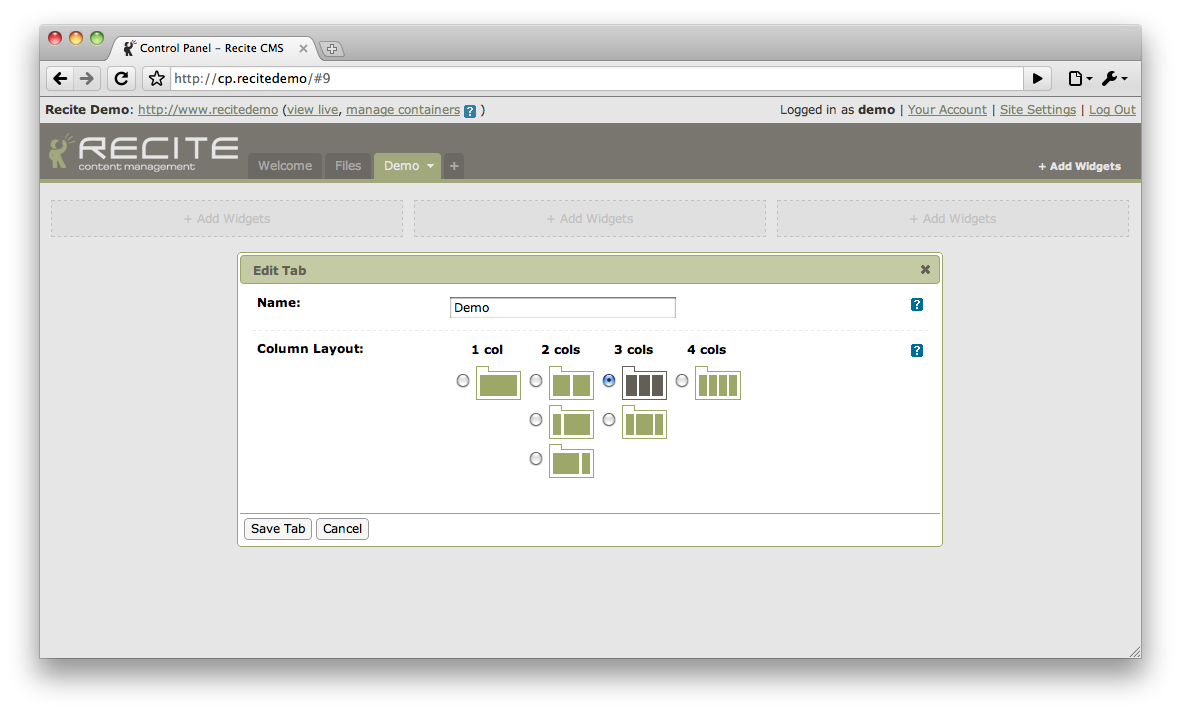
When you create a new (blank) tab, it will be created with three columns, all of equal width. If you want to change this layout - or if you want to rename your tab - hover the options arrow on the name of the active tab and select . This will open the tab edit dialog.
You can now rename the tab or change the column layout for the tab. If you decide you don't want to change the tab, click the button. Otherwise, click the button to save your changes.
If you have change the layout, the tab will now reload according to your new settings.
To remove a tab, hover over the options arrow on the active tab and click on . You will then be prompted to confirm that you want to delete the tab.
When you delete a tab, all of the widgets that were on the tab are also deleted. Note however that this won't impact any data on your web site.
After the tab is deleted the first tab will automatically load. If there are no tabs remaining you will be prompted to create a new tab.
Widgets are added to the Control Panel using the widget browser. To open the widget browser, click on in the Control Panel header.
When you move your mouse over this link, Recite CMS will try and suggest widgets that may be useful to you. The list of widgets it shows are based on the widgets currently being shown on the current tab.
Figure 2.11. The widget browser with the File Management category and
Import Files widget both selected.
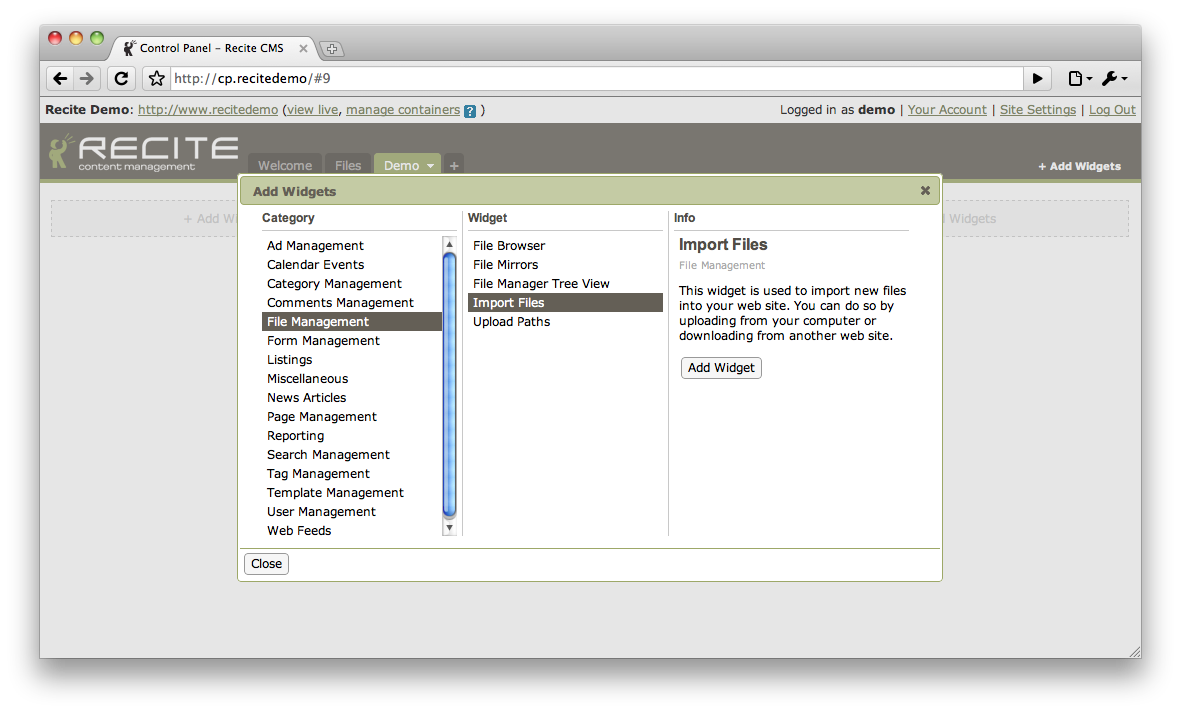 |
Widgets are grouped into categories depending on the functionality they provide.
In the above figure, the File Management category has been selected. Once
this was selected the list of widgets belonging to this category were shown.
When a widget is selected from this list, the details of that widget are loaded. Beneath the description for the widget is a button labelled . Click this button to add the widget to the current tab. It will be placed automatically based on the size of the widget and the tab layout.
If a column has no widgets in it a message will be displayed in the column indicating so. Clicking on this message will open the widget browser, and any widgets subsequently added will be added to this column.
You can add as many widgets as required while the widget browser is open. Click the button at the bottom of the widget browser once you are done.
The order of tabs can be changed in the Control Panel by clicking and dragging a tab to a new position. When you drop the tab in its new place its position will automatically be saved.
Widgets can be moved within their tab. You can move the widget to a new position in its current column, or you can drag the widget to a new column. To move a widget, click and drag in the header bar of the widget.
You can minimize a widget so only its header bar is showing. This can help you save space if you have many widgets on the current tab. To minimize the widget, click the minus icon in the widget header.
The body of the widget will change the icon will change to a plus symbol. To restore the widget to its previous size click on the plus icon.
This setting will be remembered next time you load the tab.